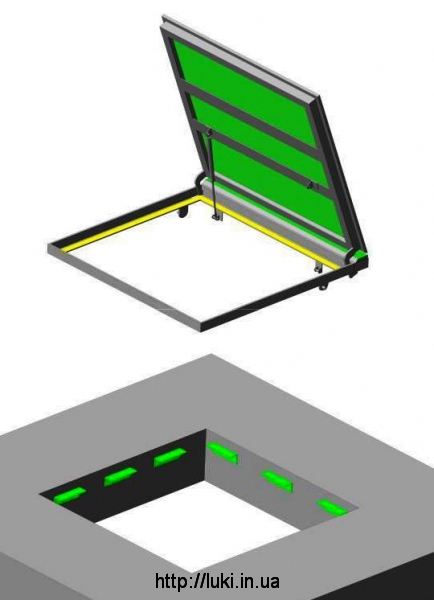
Installation for floor hatches for tile type Heavy or Light
Installation and Maintenance Guide
for floor hatches for tile type Heavy or Light
General Provisions
— Floor hatches are designed for horizontal installation with a trough on top.
— In the basic version, our floor hatches do NOT have fasteners or (and) holes.
— ALL additional elements of the hatch design to the basement are agreed upon and paid for by the Customer when placing an order.
— Our warranty obligations do not apply to gas springs.
— PLEASE DO NOT TRY TO CHECK THE POWER OF THE GAS SPRINGS MANUALLY. Believe me, all gas springs are new and working.
It is prohibited to operate a filled floor hatch with gas springs connected until the floor covering has been laid and the weight of the sash has been selected.
Installing the floor hatch and filling the trough.
Sequence of work:
2.1. Disconnect the hatch lifting mechanism (for correct and level installation of the hatch).
2.2. Mark.
Carefully place the floor hatch in the opening. Adjust the level in both planes.
2.3. Fix the floor hatch in the opening in one of the following ways:
A) Installing the hatch in the basement with overall dimensions that match the dimensions of the opening in the floor (insertion type of installation):
— Insert the floor hatch into the opening in the floor and adjust the depth so that the upper edge of the floor hatch cover is 1-2 mm below the lower edge of the floor tile on the floor (For precise installation of the hatch in depth, it is necessary to lay pieces of sealing rubber between the frame and the sash so that the sash is raised on the rubber by 2-3 mm in the closed position of the sash);
— Draw a marking line on the side walls of the opening along the bottom of the hatch frame along all four sides of the floor hatch;
— Remove the floor hatch from the opening;
— Attach to the side wall of the opening along the marking line 3 or more sections of 40x40x3 mm, 45x45x3(4.5) mm angle, each 150 mm long on each side, so that the horizontal shelf of the angle is directed towards the inside of the opening and forms a shelf for laying the hatch frame on it;
— Attach the angles to the side wall of the opening so that one angle is attached to the wall in the center of the side, and the other two are located closer to the corners of the side;
— Fasten the mounting angles to the side wall of the opening in any convenient way: with 2-3 anchors, with reinforcement, by welding to the metal frame of the opening (if any);

- Place the hatch on the prepared place and, having adjusted its position in the horizontal plane, fasten the hatch frame in the opening with temporary fasteners;
— Drill holes from the bottom up in the horizontal shelf of the mounting brackets and the shelf of the floor hatch frame with a diameter slightly smaller than the diameter of the self-drilling metal mounting screws (2-3 such holes should be prepared for each mounting bracket);
— Screw self-tapping screws for metal from the bottom up into the prepared holes, thus pulling the mounting bracket and the floor hatch frame together;
— Bite off or cut off the ends of the self-tapping screws protruding from the hatch frame at the top, without damaging the layer of polymer powder coating, and paint them in the color of the hatch frame.
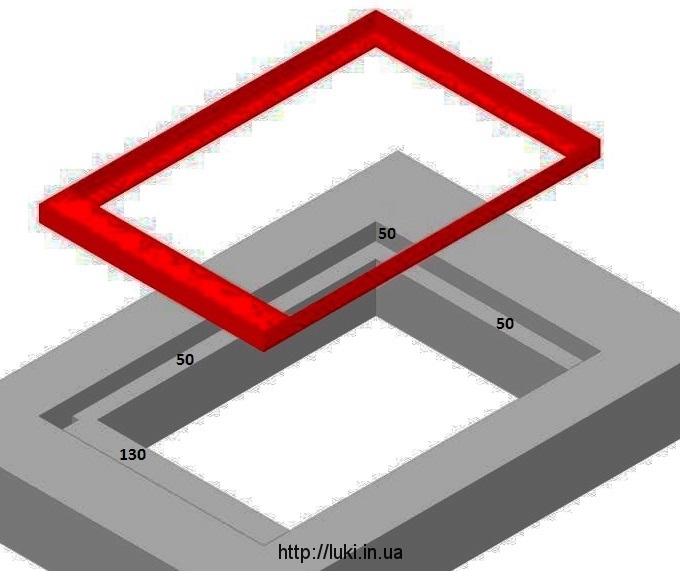
B) Installation of a hatch in a basement with overall dimensions larger than the size of the opening in the floor (surface type of installation):
- Prepare a nest in the floor near the opening for laying the hatch (the preparation diagram is sent upon request of the customer)
- Insert the floor hatch into the opening in the floor and adjust the depth so that the upper edge of the floor hatch cover is 1-2 mm below the lower edge of the floor tile on the floor (For precise installation of the hatch in depth, it is necessary to lay pieces of sealing rubber between the frame and the sash so that the sash is raised on the rubber by 2-3 mm in the closed position of the sash);

- Place the hatch on the prepared place and, having adjusted its position in the horizontal plane, fix the hatch frame in the opening with temporary fasteners;
- Drill holes in the shelf of the floor hatch frame for fastening anchors with a countersunk head. For a countersunk head of an anchor, it is necessary to drill the edges of the mounting holes (it is necessary to prepare 3 such holes on one side);
— Through these mounting holes, drill holes in the screed for mounting anchors with a countersunk head;
— Screw the anchors into the prepared holes, thus securing the floor hatch frame in the socket;
— The anchor head should not protrude above the surface of the floor hatch frame shelf by more than 1-2 mm;
If the condition of the upper layer of the screed allows, then it is preferable to fasten with anchors through the VERTICAL wall of the hatch frame.
The upper edge of the floor hatch leaf should be flush with the lower level of the tile glued to the floor. For precise installation of the hatch in depth, it is necessary to lay pieces of sealing rubber between the frame and the leaf.
2.4. Before filling the trough, disconnect the lifting mechanism and close the hatch flap, placing a flat harness (belt) under it for subsequent raising of the flap.
2.5. The hatch trough is filled with the solution "BASE FOR WARM FLOOR" to a level 4-5 mm below the upper edge of the flap.
2.5.1 The weight of the flap should be selected as follows:
— open the hatch flap and connect the gas lifts;
— attach a sand bag to the bars of the reinforcing grid;
— add about 20-25 kg of sand to the bag and try to close and open the floor hatch flap;
— evaluate the efforts applied to close and open the hatch flap;
— adjust the amount of sand in the bag to achieve the optimal ratio of efforts;
— weigh the resulting sand and subtract from this weight the weight of the tiles and tile adhesive required to finish the hatch leaf;
— the remaining weight of the sand will be equal to the volumetric weight of the hatch leaf filling, i.e. the weight of the “WARM FLOOR BASE” solution, which must be evenly distributed over the entire volume of the leaf.
If it is necessary to increase the weight of the solution, it is possible to increase the weight of the solution by adding fine crushed stone to the solution in the required quantities.
To make the leaf of large floor hatches as light as possible, 20 mm thick polystyrene foam squares can be glued to the bottom of the leaf (under the reinforcing grid). In this case, the reinforcing grid should not touch the upper plane of the foam.
To fill the hatch leaf, we recommend using underfloor heating bases such as Terralit ST1 or Teplover P-400.
2.6. When the mixture reaches 90% of its final strength, the trough is opened. The remaining mortar residue between the trough and the frame should be removed and the inner side of the frame and the outer edge of the trough should be cleaned.
2.7. The gas lifts and the floor hatch sash lock are connected.
The gas lifts are secured with rods to the hatch frame.
2.8. The finishing material is glued to the hatch sash according to the drawing.
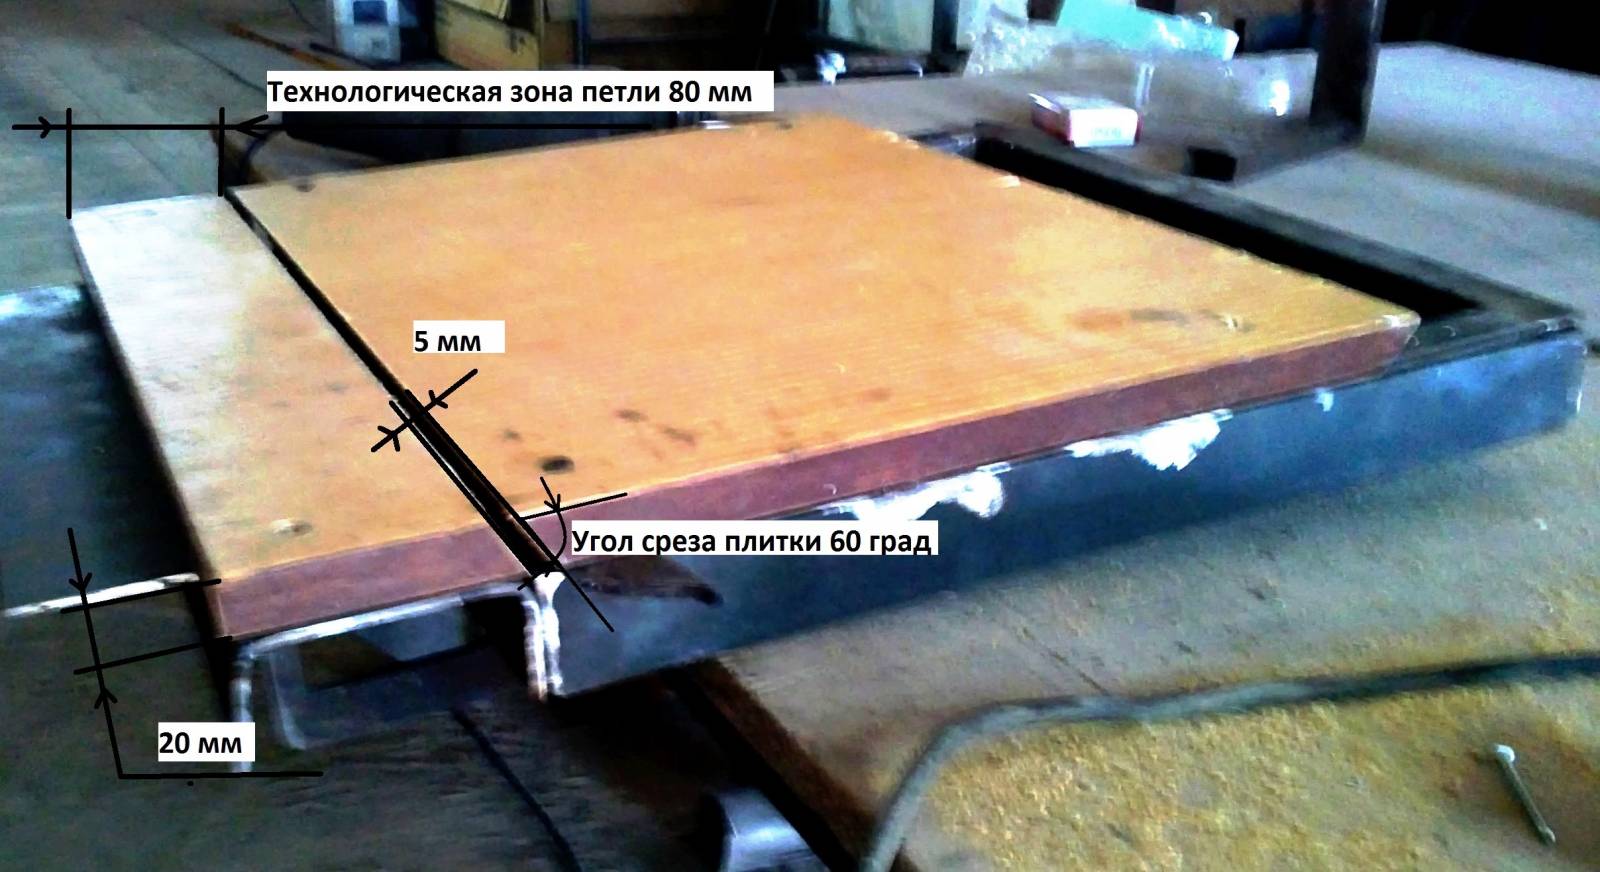
The gap between the tile on the sash and the tile on the floor on the hinge side and on the opposite side from the hinge should be 5-6 mm (with a finishing material height of 15-20 mm). When increasing the thickness of the finishing material, the inter-tile joint in the specified places should also be increased.
2.9. The width of the gap on the hinge side should be selected as follows:
- glue a tile with an internal corner ground off at 60 degrees to the hatch sash on the hinge side;
 ;
;
— opposite this tile, attach a floor tile to the floor with temporary fasteners (the seam thickness is approximately 6 mm);
— try to open and close the hatch leaf; — if the seam between the tiles is too wide, move the floor tile closer to the tile on the leaf (make the seam narrower);
— if the tile on the leaf catches on the floor tile, move the floor tile away (make the seam wider).
This way, achieve the optimal seam width between the tile glued to the floor hatch leaf on the hinge side and the floor tile glued to the floor.
2.10. After sealing the seams, carefully clean the gap between the frame and the trough (to prevent sticking).
To achieve the best heat and sound insulation and operational properties of the hatch, do not allow any hollow spaces between the hatch frame and the opening. They should be carefully sealed with a sealant such as "Mounting foam".
2.11. Glue a rubber seal around the perimeter of the sash (the first layer under the visor of the sash and the second layer at the point of contact of the sash with the shelf of the frame of the hatch to the cellar).
3. Maintenance and preventive inspection.
It is recommended to open the hatch once a month to clean it.
Provided that the installation is correct, we provide a 60-month warranty on our products
